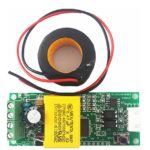
For some time I was interested in keeping tabs on energy consumption at “my” home (I mean electrical energy) but only at the end of Summer 2018 I found out (though my way wasn’t very straight) about two interesting and cheap PCBs: NodeMCU ESP-12F and PZEM-004T. In conjunction they allow me to have a remote sensor for measuring electrical energy that is being consumed by various appliances in the house.
Actually, all this mess began after I had read an article about Sonoff POW device, which is ready-to-go energy consumption monitor with ESP8266.
It has a couple of serious disadvantages, though.
– original firmware works only with AWS cloud, but I need a private system.
– though device’s firmware could be replaced with some makeshift version, I found the digital output of the measurement IC to be very inconvenient and slow (measured values represented by pulses of varying frequency).
– Sonoff POW also has 16A limit of a current because it is measured directly through internal shunt.
Then I was advised to check out SDM120 and similar power meters made by Eastron. But they were too expensive. I also tried to reduce the number of components so avoided the usage of RS485 which can’t be attached to ESP8266 directly.
That is why I have chosen PZEM-004T with RS232 interface.
Both devices had been bought on Aliexpress without any problems or disappointments.
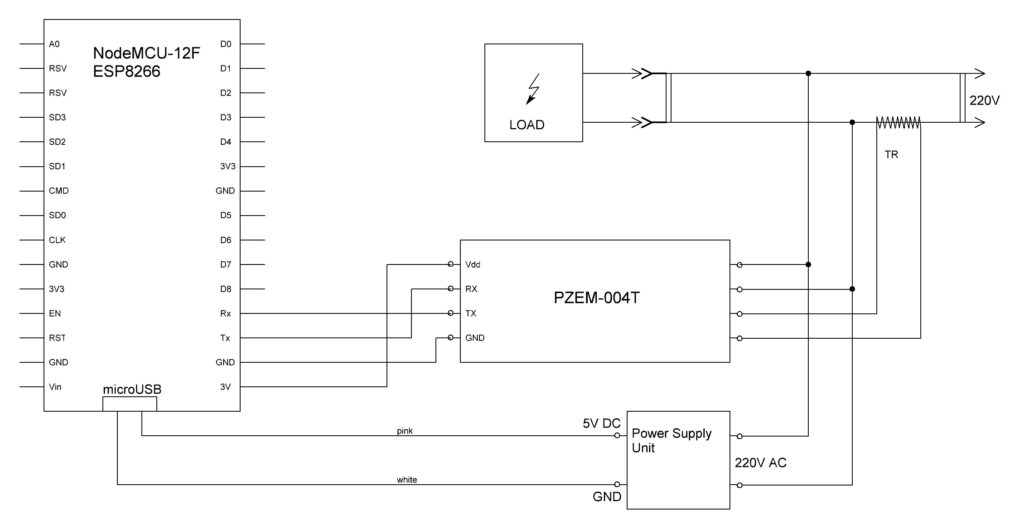
At first I hoped that PZEM, which uses measured circuit for its own power needs, would be able to supply power to NodeMCU also, but unfortunately that wasn’t the case. PZEM’s load capacity is insufficient for NodeMCU so I was forced to use a separate power supply which made the whole system less compact.
Overall schematics looks something like this:
Actually, current implementation of the device looks like a power strip, which is used to measure the secrets of life of our old fridge only, but later I hope to use some DIN box to install this power meter inside electrical shield and to measure overall power consumption.
ESP8266 has two ( or rather one and a half ) serial ports which works using 3.3V levels and PZEM has a serial port (with two optocouplers) which is supposed to work with 5V levels.
In my opinion the schematics of this decoupled serial port looks something like this:
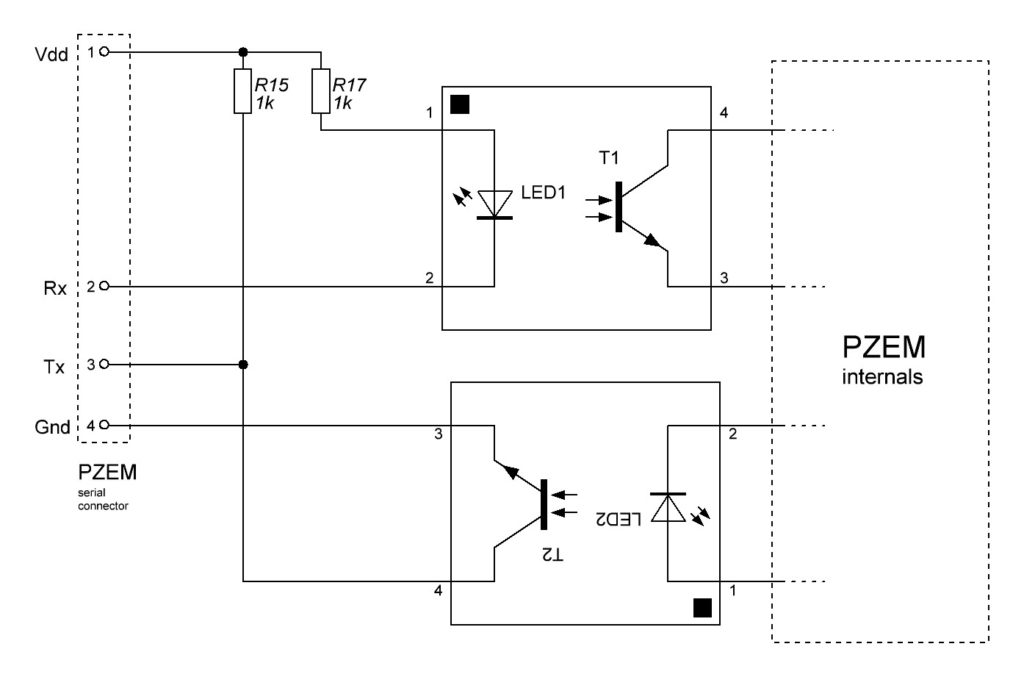
ESP is responsible for providing supply voltage Vdd and ground for its part of this port and because ESP requires 3.3V on its signal pins – Vdd must be 3.3V. To allow the port to work correctly in spite of lower Vdd you only need to reduce the value of R17 resistor to sustain a sutable current through optocoupler’s LED as it is advised on various Internet sites:
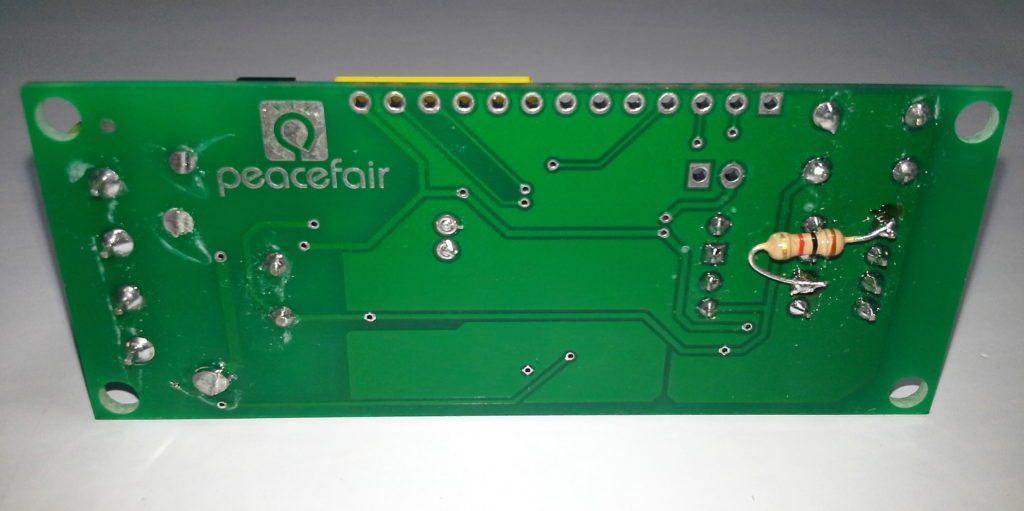
1kOhm resistor must be soldered in parallel with R17.
I don’t have and don’t need any “smart house” software and made a basic system for gathering and visualizing data.
The system has been tested and worked in a LAN segment but could be easily modified to work with remote server or be accessible from the Internet.
Overall idea
Overall concept looks like this:
1) PZEM is doing its measurements
2) NodeMCU regularly asks PZEM about its last measurement result using serial port. Requests must be separated by 500ms intervals. (I couldn’t find any manual on PZEM-004T but this timeout is widely discussed). Only Voltage, Power and total Energy are requested. These three values I deem as one consistent portion of data, though apparently they are from different measurements because of 500ms gaps between them.
3) NodeMCU has a permanent TCP connection to the linux (Ubuntu) server. This connection is initiated and maintained by NodeMCU. NodeMCU uses this connection to pass data to the server.
4) There is a daemon on Ubuntu server which listens for a connection from NodeMCU and accepts its data.
5) NodeMCU has a kind of RTC. NodeMCU’s CPU clock is used to track the time and Ubuntu server checks the correctness of NodeMCU’s “clock” with each data transmission. If time difference between NodeMCU and Server is greater than some threshold the time sync procedure is called.
6) Server daemon stores data into MySQL database. To reduce SSD wear daemon accumulates some tens of messages before writing them into database.
7) Daemon also provides a shared memory structure holding last received results for fast access from web application or from somewhere else.
8) MySQL database holds raw data with approximately 1500ms intervals and also has a roll-up table where consumed energy for each day is stored. Roll-up table is the cheapest and easiest way I know to accelerate typical queries. There are one stored procedure (trigger) and one event in MySQL database. A stored procedure is responsible for roll-up table and an event is responsible for removing old records from the raw table.
9) There is a simple web interface which allows to view current values of Voltage, Power and Energy plus a couple of graphs.
NodeMCU firmware
Firmware for NodeMCU had been written on C++ using Arduino IDE and its internal libraries for WiFi, serial port etc.
Communication protocol for PZEM-004T had been taken here but the description of protocol only, not the library.
At first I tried to write a firmware using esp-open-sdk but it proved to be too difficult 🙂
It took considerable time for me to figure out why their sole example of blinking LED doesn’t work and even after that I couldn’t find any consistent documentation or examples.
I am also not quite familiar with manual editing of Make files which is required for esp-open-sdk.
Perhaps, for some serious projects and having already a great experience one should choose this SDK but it would have been overkill for me.
I won’t describe here how to setup Arduino IDE for ESP8266 – there are plenty of other resources for that purpose with screenshots and detailed description.
The first firmware upload had been done via serial port (NodeMCU has usb-to-serial convertor onboard) and after that I used OTA firmware updates.
For a Microchip PIC guy like me, OTA on such a small cheap board is a true miracle 🙂
Here is my Arduino sketch with comments. If you are intended to use it you should at least change the values for WiFi SSID, WiFi password and OTA password.
IP and port for a listening daemon is also hardcoded in this sketch (192.168.100.100:40000)
PZEM-004T emulator
Funny enough, but I’d got NodeMCU a couple of weeks before PZEM-004T and began to write firmware and daemon before I could get real measurements.
That is why I’ve written a simple emulator of PZEM-004T for Linux.
And that is why I have become somewhat disappointed in Perl.
I usually write scripts in Perl so I began to look for a Perl module which would facilitate my interaction with serial port.
At first I had found only one such module – Device::SerialPort.
And it didn’t work.
The PZEM emulator based on Device::SerialPort worked properly for a short period of time and then began to send and receive wrong bytes. I do not remember whether there was a trigger for such behavior or not. I just remember that I had spent a few days looking for errors in my script and testing it on different hardware before I found another Perl module – IO::Termios.
It’s funny also, but Device::SerialPort worked much better on Windows Subsystem for Linux than on real Linux boxes including Kubuntu 18.04 and Ubuntu 16.04 Server.
With IO::Termios module my emulator worked pretty good, but now I’m convinced that I should give Python a try…
In this script, you may just change the path to your serial port device (in my case it was /dev/ttyS7) and run it on a PC with NodeMCU attached to USB port. NodeMCU should work like PC is a PZEM device which produces simple saw-like data.
Daemon
The next component is a daemon, written in Perl.
It’s a network daemon arranged as a simple systemd service. It listens for connection from NodeMCU on a certain port and uses prearranged text-based protocol to send and receive data.
Protocol is very simple. A message form ESP is just a string of a few space-separated values of temporal and electrical data.
The only message that daemon could send to ESP is “ADJUST TIME” followed by two copies of textual representation of epoch time.
Daemon also maintains a structure in a shared memory which contains the latest data from PZEM.
Daemon logs its activity using syslog. At first I used email messages for such logging, but when the device had been placed on its final residence, which is separated from WiFi router by two walls, I got a flood of messages about connection troubles.
To make this flood even more manageable I’ve made a separate log file for local0 facility which I use for my scripts.
In /etc/rsyslog.d/50-default.conf the string was added:
local0.* /var/log/myscripts/scriptmsgs.log
And in /etc/logrotate.d/ I added a file named myscripts with this content:
/var/log/myscripts/scriptmsgs.log {
       copytruncate
       daily
       rotate 7
       delaycompress
       compress
       notifempty
       missingok
       create 640 syslog adm
}
So my daemon has a separate log file with rotation.
Reliability
During the test period of about three months I got one serious error.
There was a period of time when electricity went off almost each day abruptly and unexpectedly. Sometimes even several times per day. After one of those blackouts I noticed that data, written into internal memory of PZEM are wrong. PZEM has internal counter of measured total energy which is stored on EEPROM and PZEM had failed to write it correctly during the energy failure.
That is why this chinese device couldn’t be used in serious applications.
Here is the dump of the database (it had slightly different scheme then) around erroneous row:
('2018-11-20 22:06:20',    '2018-11-20',    201811,    201847,    222.2,    136,    180543),
('2018-11-20 22:06:21',    '2018-11-20',    201811,    201847,    222.2,    138,    180543),
('2018-11-20 22:06:23',    '2018-11-20',    201811,    201847,    221.8,    136,    180544),
('2018-11-20 22:06:24',    '2018-11-20',    201811,    201847,    221.8,    139,    180544),
('2018-11-20 22:06:26',    '2018-11-20',    201811,    201847,    221.6,    135,    180544),
('2018-11-20 22:06:27',    '2018-11-20',    201811,    201847,    221.6,    140,    180544),
('2018-11-20 22:06:29',    '2018-11-20',    201811,    201847,    221.6,    140,    180544),
('2018-11-20 22:06:30',    '2018-11-20',    201811,    201847,    222.0,    136,    180544),
('2018-11-20 22:08:27',    '2018-11-20',    201811,    201847,    186.9,    138,    167539),
('2018-11-20 22:08:29',    '2018-11-20',    201811,    201847,    186.9,    140,    167539),
('2018-11-20 22:08:30',    '2018-11-20',    201811,    201847,    184.5,    138,    167539),
('2018-11-20 22:08:32',    '2018-11-20',    201811,    201847,    184.5,    138,    167539),
('2018-11-20 22:08:33',    '2018-11-20',    201811,    201847,    184.5,    137,    167539),
('2018-11-20 22:08:35',    '2018-11-20',    201811,    201847,    188.7,    137,    167539),
('2018-11-20 22:08:36',    '2018-11-20',    201811,    201847,    188.7,    137,    167539),
('2018-11-20 22:08:38',    '2018-11-20',    201811,    201847,    192.7,    139,    167539),
('2018-11-20 22:08:39',    '2018-11-20',    201811,    201847,    192.7,    141,    167539),
('2018-11-20 22:08:41',    '2018-11-20',    201811,    201847,    192.7,    140,    167539),
('2018-11-20 22:08:42',    '2018-11-20',    201811,    201847,    199.5,    138,    167539),
('2018-11-20 22:08:44',    '2018-11-20',    201811,    201847,    199.5,    139,    167539),
('2018-11-20 22:08:45',    '2018-11-20',    201811,    201847,    199.5,    136,    167539),
('2018-11-20 22:08:47',    '2018-11-20',    201811,    201847,    205.3,    134,    167539),
('2018-11-20 22:08:48',    '2018-11-20',    201811,    201847,    205.3,    140,    167539),
('2018-11-20 22:08:50',    '2018-11-20',    201811,    201847,    208.4,    135,    167539),
('2018-11-20 22:08:51',    '2018-11-20',    201811,    201847,    208.4,    134,    167539),
('2018-11-20 22:08:53',    '2018-11-20',    201811,    201847,    208.4,    135,    167540),
('2018-11-20 22:08:54',    '2018-11-20',    201811,    201847,    214.0,    136,    167540),
The first column is obviously DATETIME of the measurement and the last is total energy.
As you can see, there was short outage in 22:06:30 which lasted less than 2 minutes, but during which total energy counter had been corrupted and 13KWh had been lost.
After that I was forced to use “virtual energy counter” which is maintained by daemon only.
Virtual energy counter can’t save me from errors in internal energy counter because it relies on its changes, but in case of error the virtual energy counter can easily be corrected in database whereas internal energy counter couldn’t be corrected at all (as far as I know).
MySQL
MySQL schema including roll-up trigger can be downloaded here.
And my purging event looks like:
CREATE DEFINER=`root`@`localhost` EVENT `clr_old_pwrdata` ON SCHEDULE EVERY 1 DAY STARTS '2019-01-25 04:20:00' ENDS '2022-01-25 04:20:00' ON COMPLETION PRESERVE ENABLE DO DELETE FROM powerdata WHERE pwr_timestamp < DATE_SUB(DATE_FORMAT(NOW(), '%Y-%m-%d 00:00:00'), INTERVAL 30 DAY) |
Web interface
The last component of the system is a web-interface.
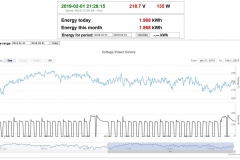
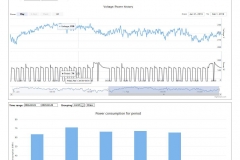
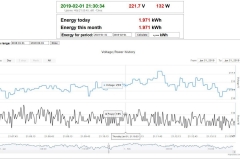
I use simple, non-responsive page with one block of current data and two graphs.
Highcharts Javascript library is used to visualize the data.
I really doubt that anybody would use my cgi scripts or TT templates :), but anyway, here is my CGI script which serves the page shown on images above.
The system works almost well. The only one inconvenience is database.
The database is small but has huge impact on SSD wearing.
I’m still thinking on how to improve this situation…
8 Comments
Hi Alexander
Thank you for sharing all your hard work with the world. I have been using PZEM-004 connected to a ESP8266-NodeMCU running Tasmota (which is amazing how Theo Arends has written it is beyond me) for power measurements but the stability is poor. I have found your article very interesting and helpful.
Thanks again, keep up the good work
PS your written English is really really good, so much better than many native English speakers
Thank you for your kind comment, Ben!
Hi,
Thank you for sharing valuable info.
I just received my PZEM-004, but the supplier send the latest version V03 instead of V01. I see no point where I can sold resistor for communication with ESP-8266.
I any idea how it can be attached to ESP-8266
Regards
Bilal
Hi!
I have no idea how v03 PCB looks like 🙂 Can you provide images of the front and the rear side of it?
Can you identify optocouplers on the PCB? Do you have a multimeter or any device to test circuits?
If PCB has optocouplers you should just find them, find one which is responsible for Rx pin and reduce the value of its resistor according to the second schematics in this article.
Hi,
Thank you for your response.
I am sharing link for new version PZEM PCB. Kindly just point out the terminals where I should connect the resistor.
https://drive.google.com/open?id=19dca3lzUzato4y14AM-xUQzi15nLK-R8
I know I am asking for too much but being noob it will help me alot.
Thanks again
Bilal
Hi!

I can’t be absolutely sure because I do not have PCB and therefore unable to check routes there, but I believe that V3 PCB has basically the same schematics of data port.
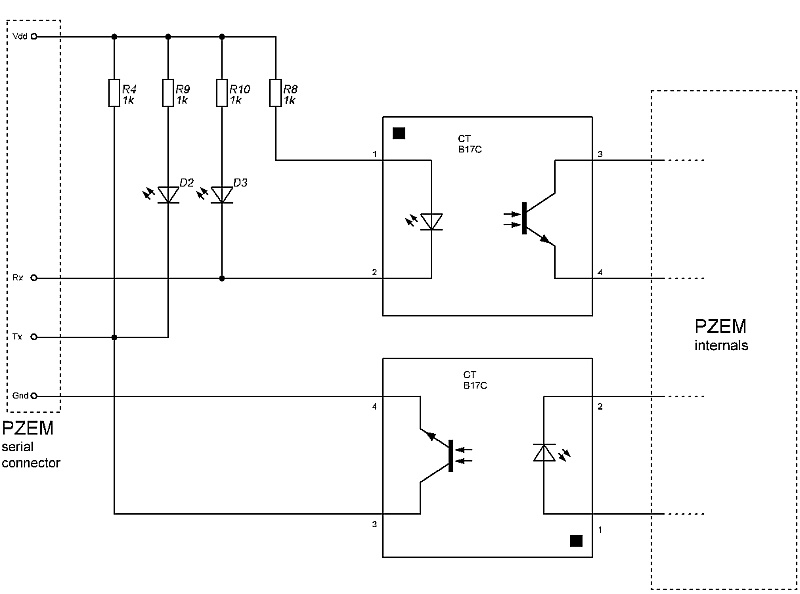
Only our resistor is now named R8 and it seems a couple of LEDs added so something could blink during data transfer.
Therefore a 1kOhm resistor should be soldered between “5V” pin of the port and the first (closest to key) leg of the receiving optocoupler.
Unfortunately, all elements are smd now and there are no access to optocoupler’s legs on the back side of the PCB.
So, apparently you should solder your resistor on the front side.
I’ll draw full circuit of V3 port (as I understand it) later.
Image of resistor placement
As far as I can deduce from your pictures and other which were found on the Internet the schematics of serial port for PZEM V3.0 PCB looks like:
